Install App Store WSL, Now Microsoft Recommended - Faster/Better
Table of Contents:
New App Store WLS
WSL, which is short for Windows Subsystem for Linux is Linux running with Windows on an almost equal footing. Linux behaves as if it is part of Windows. It has access to both file systems. The API from both is accessible from the other. The new WSL allows the Windows user to now have access to all the great Linux apps. Developers WSL for cross-development scenarios. They also like access to both Linux and Windows tools in their workflow.
Before October 11, 2021, you had to install WSL from the command inline in Windows. Microsoft now has released WSL in the App store as a better alternative.
The App store version is a much simpler and faster install process than the old way. The other advantage is that the App store WSL system is independent binary, just like any other App, and will be updated more often than the original WSL system. The previous WSL was part of the Windows 10/11 system binary. It was only updated when Windows was updated.
Install Windows Subsystem for Linux (WSL)
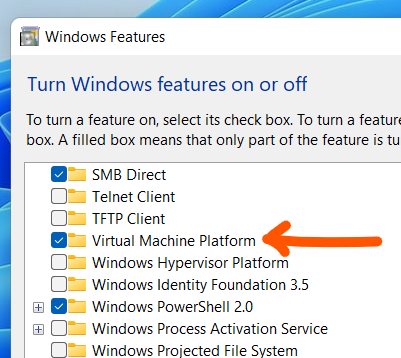
Before you do anything, you must turn on the Windows Hypervisor Platform feature: Search (Windows Key) for Windows Features, and then open. Turn on the checkmark next to Windows Hypervisor Platform, then restart your system to complete the install process.
Go to the Windows App Store and search for Windows Subsystem for Linux Preview. Install it and wait. Once installed, you need to open it, let it run, and then close it. The WSL system is now ready for the Linux Distro.

Note: if you already have WSL installed, you can remove it before installing the App version by going to the Windows Features dialog of the control panel and turning off the Windows for Linux Subsystem option. Then restart your system to complete the install process.
Install Ubuntu 20.04 or your choice of Linux Distro
The App Store has several distros that you can install: Note that all WSL distros do not have built-in window managers. In other words, they are not Desktop Distros. Although you can install GUI programs that will run in the Windows desktop environment.
- Ubuntu20.04 (and other versions)
- OpenSUSE
- Enterprise SUSE
- Debian
- Fedora
- Kali-Linux
- Apline (lightweight)
- and more available now and in the future
The commands in Linux in this article are for the Debian/Ubuntu package manager apt. Other distros may have different commands for managing, updating, and installing apps.
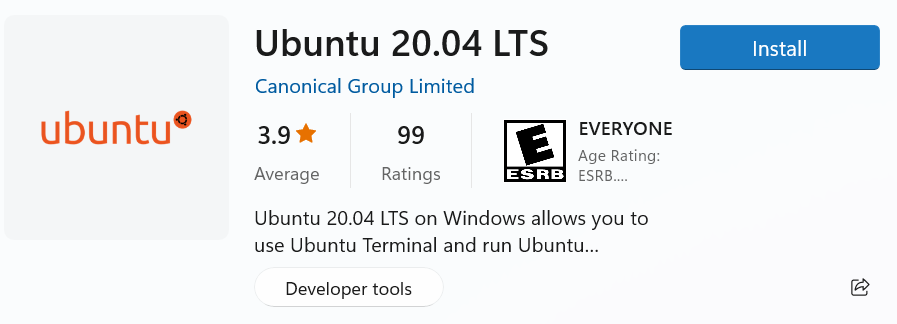
Go to the Windows App Store and search for Ubuntu 20.04 and install and open it.
Setup Ubuntu for use, by using app update and app upgrade commands
Upon opening Ubuntu for the first time, it will ask you to create a new user by asking for a username and password you would like to use to log in. (Linux has its own independent login system)
You must now upgrade the system.
Linux systems are composed of lots of pieces called packages. Like Windows, Linux systems have frequent updates to these packages. You should check for updates and apply them regularly. I do it every day, when I sit down to use the system, but only once per day.
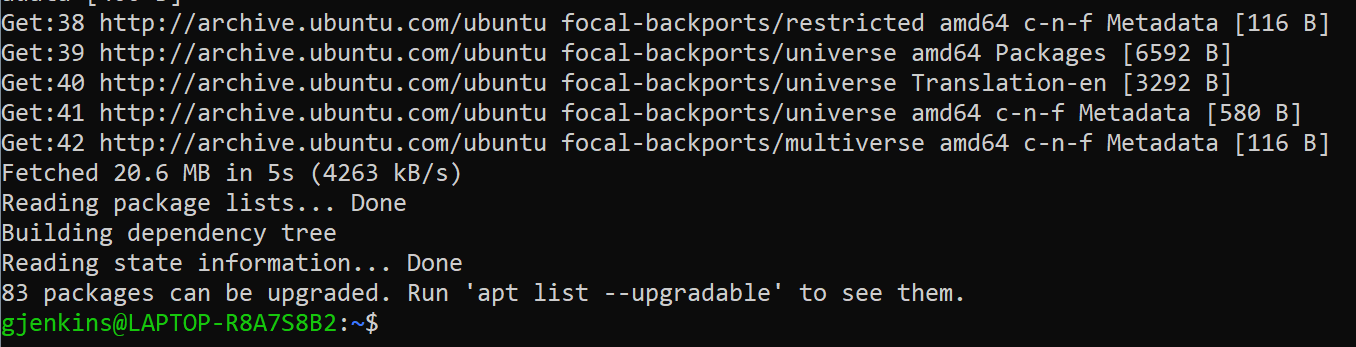
The first command is called the sudo apt update command. It will get the list of all the current packages online and compare it with your system. It then will report how many packages need upgrading to a newer version. You will use this command to prepare for a possible upgrade and before the installation of new software.
Go ahead and type the command, followed by the enter key: Note that sudo ask Linux to do the command as an administrator or (root in Linux lingo). So it will ask you for your Linux password.
sudo apt update
Last part of Output:
Now to upgrade all the out-of-date packages, type the following command and then the enter key:
sudo apt upgrade
Output up to “do you want to continue?":
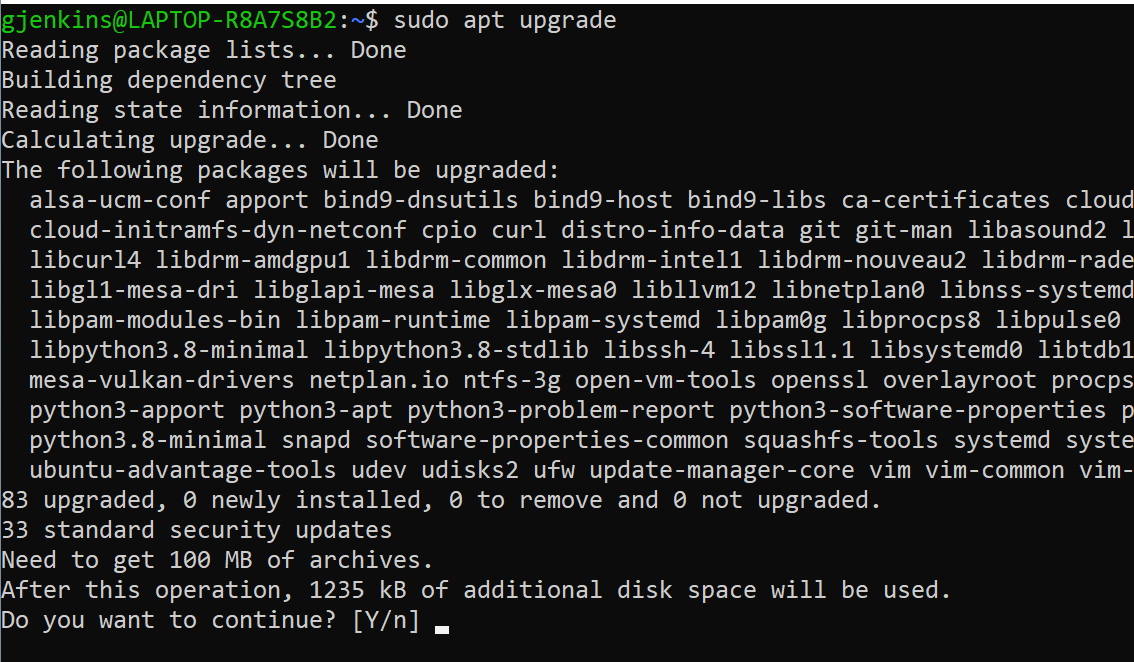
You will need to answer Y and enter when prompted if you want to proceed with the upgrade. (To automatically answer yes, you could issue the sudo apt upgrade -y command instead.)
Output showing progress bar and then the end of the upgrade:

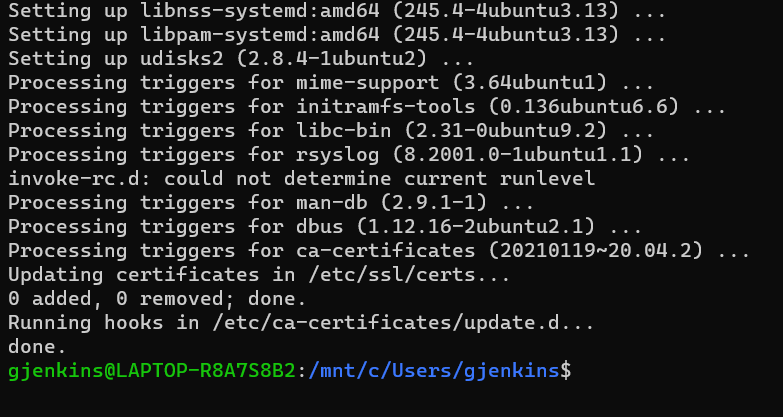
You have now upgraded the version of Ubuntu20.04 from the App store to the current version.
NOTE: You should do this twostep sequence of
sudo apt updateandsudo apt upgradeoften to keep your versions of Linux and apps UpToDate. They are not automatic like on windows. I do it when I sit down at my computer for the day. You usually do not need to do it more than once per day.
Install a CLI or ‘terminal’ App
A terminal App, also called a Command Line Interface App, or a CLI App, is a program that only runs in the terminal. It gets any user input or interaction with input from the keyboard. It presents output to the terminal instead of using a Window.
CLI apps are all that the early WSL Linux systems used to do. But the new WSL system allows you to install apps that appear a regular Graphical User Interface (GUI) windows which will interact with the Windows desktop, a pointing device and more.
We will install a simple CLI App called ranger which is file explorer that is controlled by the keyboard. The ? key will get you help when you open it. You can watch short video on using ranger: How to use ranger: 2-Minute Linux Tips.
Now Type:
sudo apt install ranger
Output to Do you want to continue:
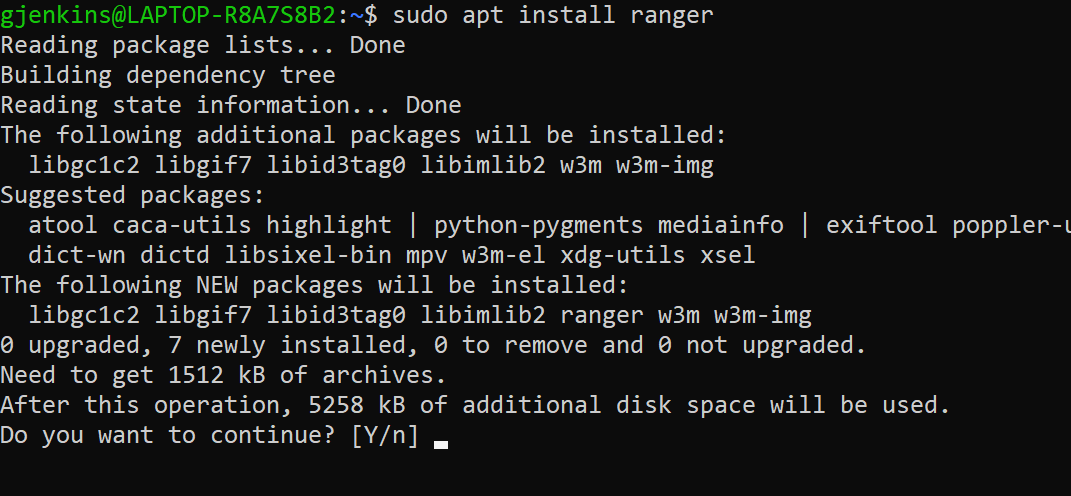
Answer Y here when asked
Last part of output:

To run ranger, you just type its name at the prompt and hit enter
ranger
Output: You see ranger running here, you can use the arrow keys to navigate the file system. In this case I have move left until I got the base of the Linux filesystem which is /. Then I used the right and up and down arrows to navigate from the Linux file system into the windows file system via the /mnt/c drive. Then I went to my Documents folder located at /mnt/c/Users/gjenkins/Documents.
To quit ranger, just hit the q key, to get help hit the ? key.

Install a Windows-based (GUI) App
The GUI apps on Linux require a large ecosystem of packages to run. So, the first time you install one, it will take a while to install. There are also several GUI APIs that Linux Apps are based on. The two of the most popular are Gtk+ and Qt.
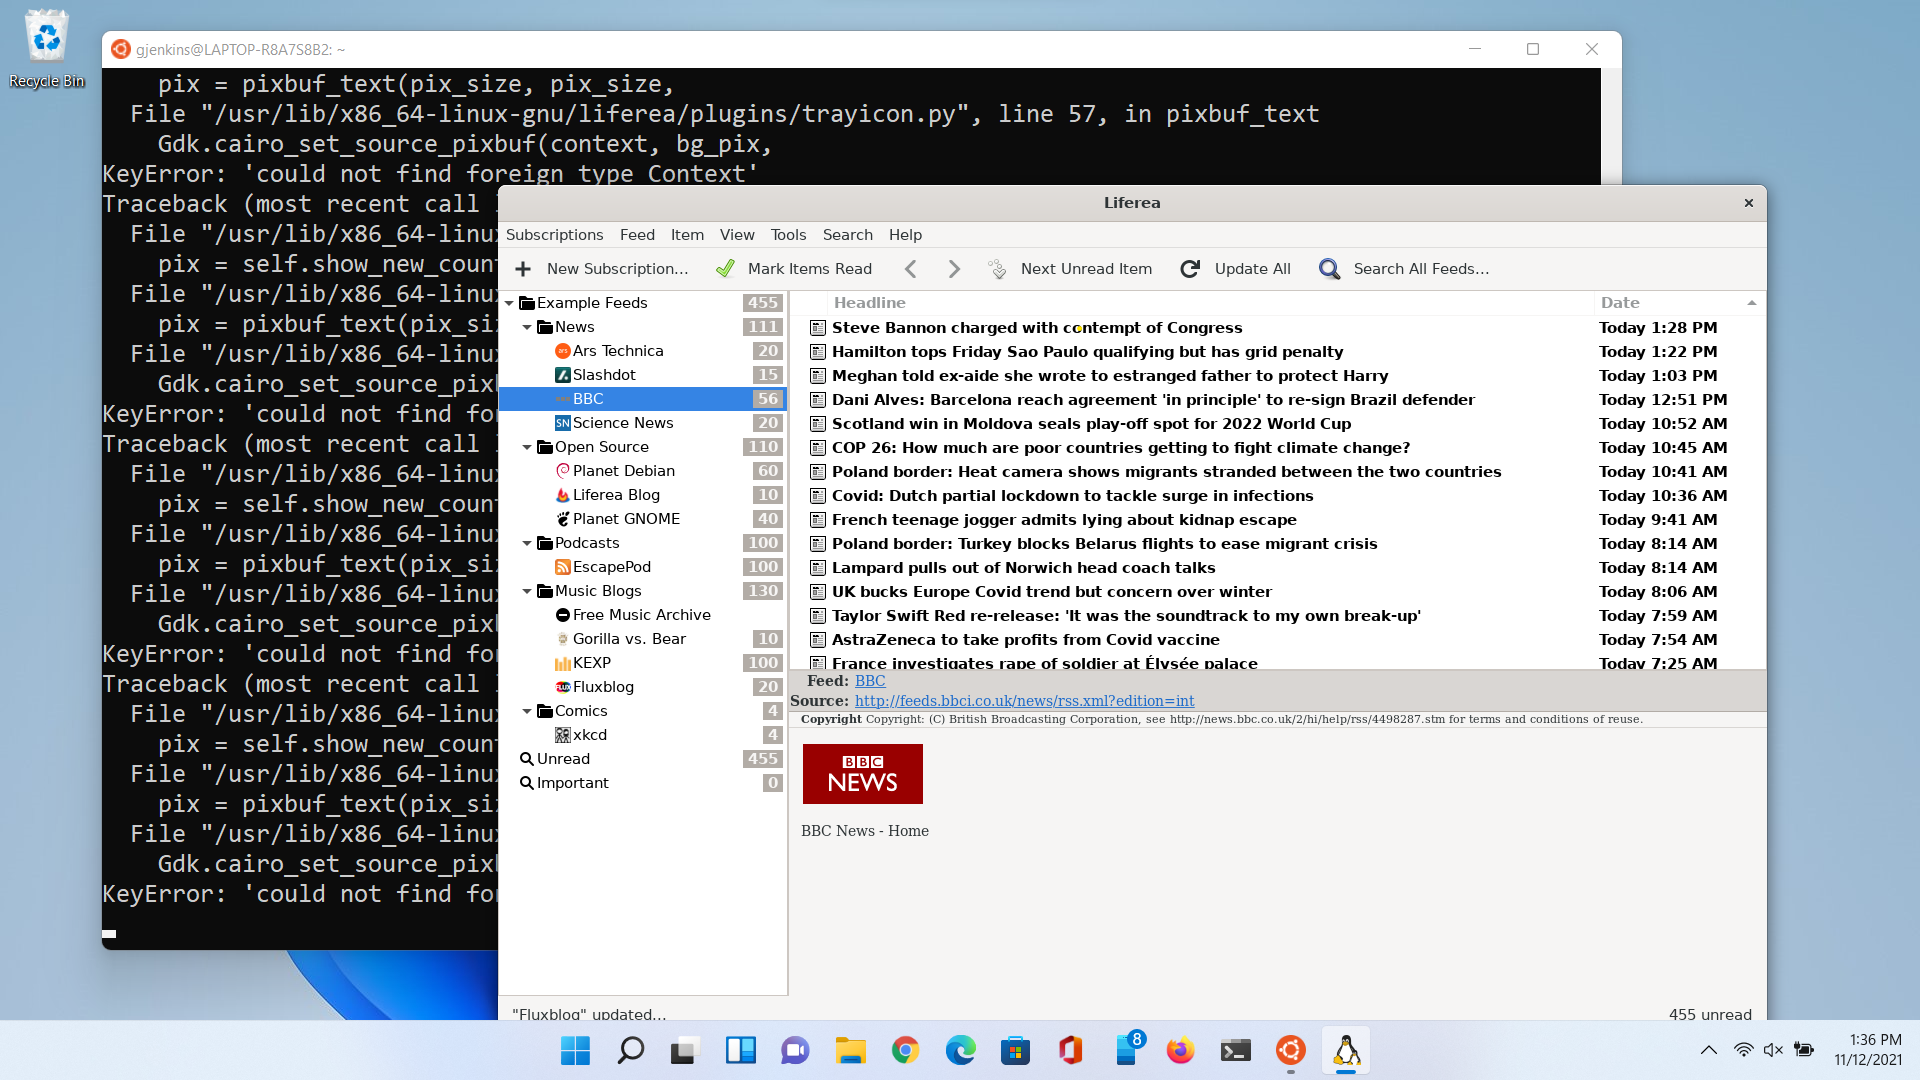
We are going to install a program that is called a News Aggregator called Liferea. (See this video for how to use: How To Use The Liferea RSS Reader On Linux)
From the command line enter
sudo apt install liferea
Output part 1:

Just like the last App, you will answer Y to the Do you want to install Questions.
You will now need to wait for over 700 lines of output. It is installing all the GUI related packages as explained above. One the GUI packages are installed, next time you install a App that need the same type of GUI support, the install will much shorter.
When it is done (you will get a new prompt), you will be back to the prompt. Now to run it, you this command to run it:
liferea &
Note: the & after the command says to start this in a new process rather than running it as part of the terminal. If you leave off the & then it will run, but the terminal will not respond till it is closed, or you type Ctrl+c to terminate it.
You will see error messages and notices sent to the terminal. This is normal behavior for an App. With Liferea, these messages are related to the program not being able to add an icon to the taskbar. But Liferea seems to recover from this and work fine in other areas.
Showing Lifera running with typical error messages behind in the Terminal:
Close the App just like you would a windows App, with the X button in the title bar.
Not all apps will run without error in WSL in windows, I did have one freeze everything, but most Apps run fine in windows.
Removing a Distro
Making all the parts of a distro go away used to be a bit buggy, But Microsoft seems to have fixed this during the time that I was writing this article.
Now, when you go to the “Add or remove programs Control Panel”, you can remove it just like any other App in Windows. I recommend that you remove the Distros before removing WSL itself.
Remove WSL
To remove WSL itself, is the same, just go to where you remove Apps, and remove the “Windows Subsystem for Linux Preview” App.
List of usefull WSL commands
wsl --statuswill list general information about WSL configuration such as the kernel version and default distributionwsl ~to start in the user’s home directory from Windows Terminal, Power Shell, or CMD.exe.wsl --shutdownto ‘turn off’ WSL, this will free up system resourceswsl --terminate <DistroName>This will stop the named running distribution. Note it is possible to have more than one running.
There is a lot more to managing and using WSL that if you are serious, you should read the Microsoft Documentation from the link in the reference’s sections below.
Some reasons people use WSL/Linux
WSL runs much closer to the hardware then a Linux installed in VirtualBox or VMWare. It is designed to provide more access to Windows resources than a virtual machine.
Distros are easy to install from the App Store, without the normal hardware, partitioning, and installation steps you normally would need to go through to install a Distro.
Some observations for a reddit forum questions when asked why you use WSL
- Especially liked by developers that need to work in dual systems of Linux and Windows
- Some find the Linx utilities more powerful for working with files in Windows
- Some like running their development stack on WSL
- Some like It for ssh, git, and vim or Emacs since they are more integrated than the separate versions of these programs on Windows.
- Some like the vast selection of Apps available, check out 100 best linux apps
- Some are running an actual desktop environment on WSL for development.