The Unofficial Manual: Windows 11 Snap Windows and Groups
Table of Contents:
Intoduction
Snapping and grouping windows to non-overlapping areas of your desktop is much more efficient than just moving and resizing the windows to accomplish the same thing.
Earlier versions of Windows allowed you to ‘snap your window’ to the right or left side of the screen using the mouse or keyboard shortcuts.
Windows 11 has added the ‘Snap Windows’ feature. Now you can snap windows into preset tile layouts or customize your own.

First two rows are Windows preset layout choices. Last Two show possilbe layouts by techniqes described in article
Note that Windows 11 only allows stacking two tiles vertically when those tiles are on the left or right side of the monitor. All tiles that don’t touch the left or right sides must be the full monitor height.
Snapping windows in Windows 11 creates groups of windows attached at the edges like they were magnetically locked. Together all these windows are known as a snap group.
Using Preset Layouts
With three windows open on the desktop, pick a window and hover your mouse pointer over the Maximize icon in the title bar to drop down an image of several possible snap group layouts. Click a tile within a snap group. (Note, that the keyboard shortcut Win+Z will open this dropdown for the current window.)
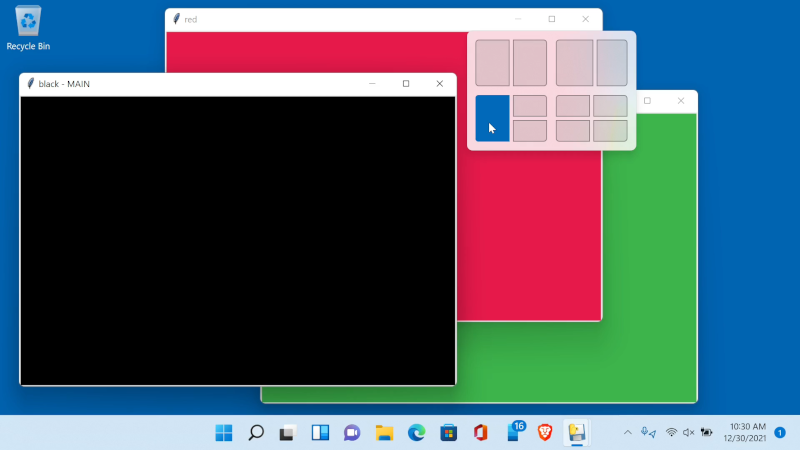
Picking from the snap layout dropdown.
The window will ‘snap’ into that position, and the Snap assistant will then show the remaining windows in a tile.
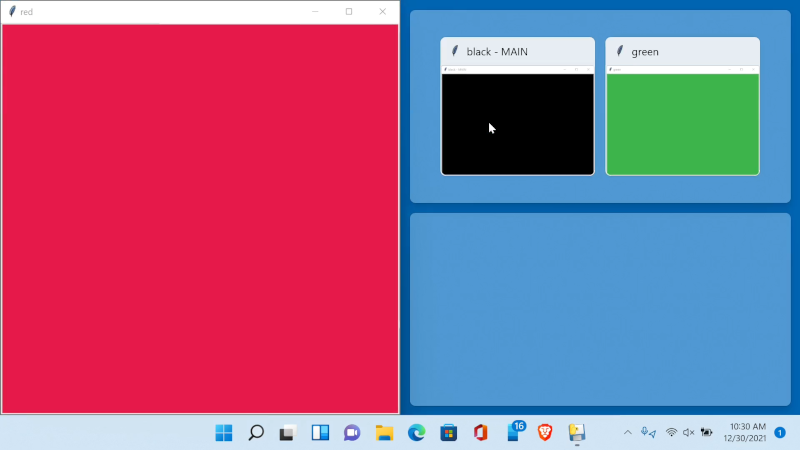
The first window is snapped, and the Snap assistant is shown here.
Click on which window in the snap assistant area you want in that tile. The snap assistant will then move to each tile remaining as long as there are still unplaced windows.
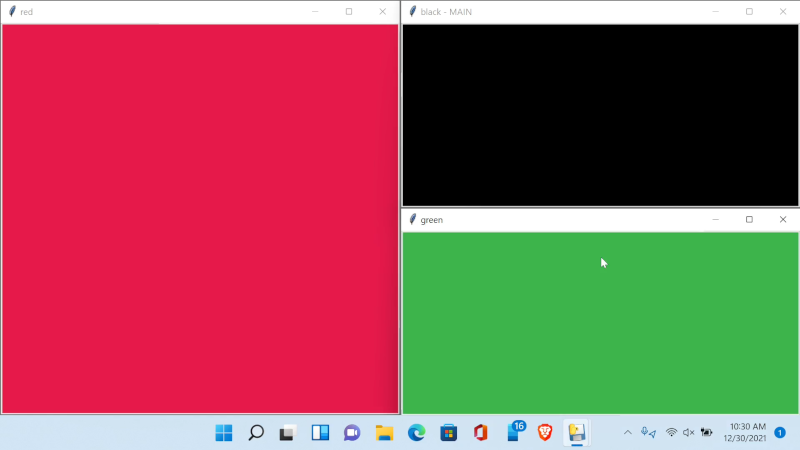
Final arrangement of windows
Note: If your display has a higher resolution, You will see six choices in the snap layout dropdown instead of the four shown above. If you only have four shown, you can still tile your windows into the more complex layouts, but you will need to use the more advanced manual techniques shown later in the article.
Managing Snap Groups and resizing windows
Once two or more windows are snapped together, they are called a Snap Group.
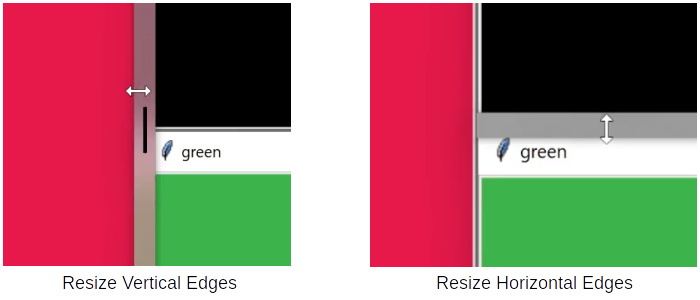
Resize windows in the snap group by dragging the boundary between any adjacent windows of the group.
Hover over any of the applications in the group on the taskbar to see the group listed. If you don’t see a group listed, then none of the windows are in a group yet.
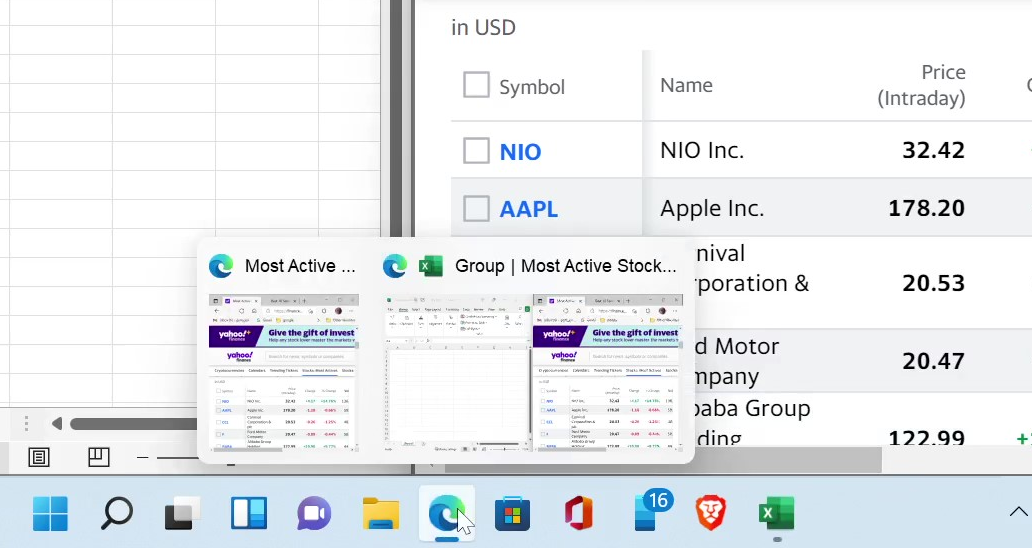
group popup from hover on excel member of group
Minimize, Restore, or Close the Snap group by right-clicking on the taskbar group popup and choosing options. You can also access settings for Snap Group Behaviour here.
Minimize causes all the windows in the group to be minimized, allowing you space to open another application, and then when done, use the restore option to return them. The Close option will close all the windows of the group.
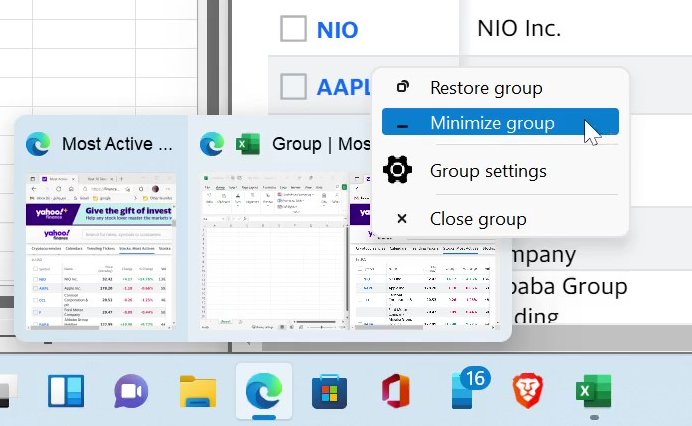
menu when you right click on little group picture
Starting a Snap Group
All *snap groups start by snaping one window into a grid, as shown in the example. You can also use the mouse or keyboard shortcuts to start the first window into a snap pattern. This allows you more control over the final layout beyond what is avaliable in the dropdown grids.
Once you snap the first window, if you have any unsnapped windows, the Snap Assistant will open to ask where to put the other windows. You can cancel the Snap Assistant with Esc. If you cancel the Snap Assistant, you can manually place windows adjacent to the windows that are already snapped with the mouse or keyboard techniques.
Snap Using Mouse to Corner or Side
You can move a window to the starting position for a group by dragging it to a side or corner:
Play the animation below to see this technique:
Snap Using Keyboard Commands
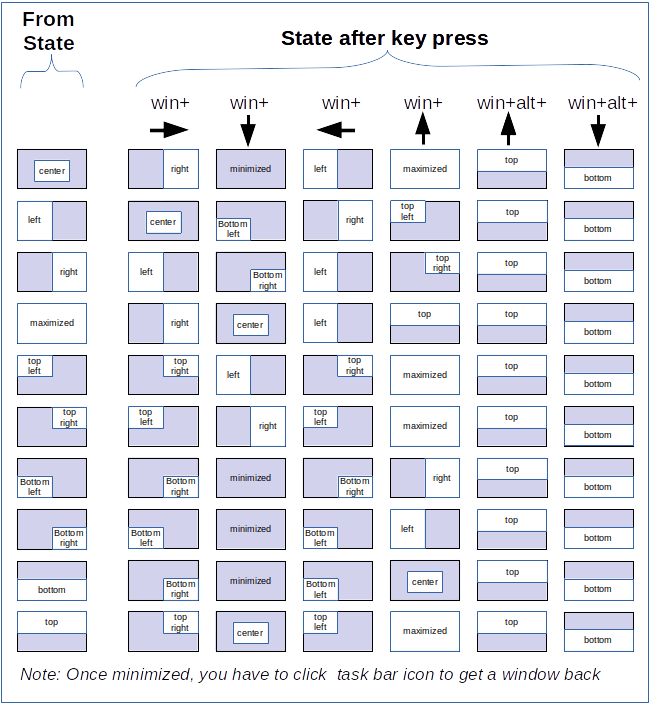
There are two sets of keyboard commands. The simple Win+Arrow commands for moving window to side, and then once there, moving it around to all corner and screen edge positions:
Play the animation below to see this technique:
Note: If your window is in a corner, top, or bottom, and you use arrow directions that do not point to an adjacent ‘grid’, you may get other actions such as a center window, Maximize, or Minimize.
Win+Alt+arrow will snap to the top, bottom, left, or right side. Note, the right or left side snap can also be done without the Alt, just using Win + left arrow, or Win + right arrow.
You should create one window, and then play with the win+arrow and win+alt+arrow, until you you understand the logic of these keys.
Below is a complete transition chart. (I left off the Win+alt+ right and left arrow, since they behave the same without the alt modifier.)
Adding more windows to a Snap Layout
with Snap Assistent
When you snap a window, and you have more windows open that have not been joined to the snap group, The snap assistant will then be activated for you to place these windows, even if they re minimized.
with the Keyboard or Mouse
If you open a new window and want to place it into the layout grid, you can always drag the window into place or use the Win+arrow key shortcuts to place the window into the snap group. You can verify it is in the snap group by hovering over any of program icons of windows that are in the snap group in the task bar, and see if the window is shown as part of it.
Getting more than five windows into a snap group
If you just open windows and then drag, resize, or use the snap key combinations to move your windows so that they are all adjacent to other window edges and to the edges of the display, then you can obtain almost any possible layout.
When you move an edge of a window using move or resize so that it exactly matches the edge of an adjacent window, the windows will “snap” that window to the other one. Like they had two magnets on the edges that ‘shaped’ them together. Although I have played around with this, it is time-consuming, and does not always seem to work.
Another factor is that different applications have a minimum width or height that you cannot size below these limits.
Also remember, that you can not do layouts with stacked windows within the “middle” of the layout design, only on the left and right side of the desktop.
Easy way to get complex layouts
I found the following to be the best technique.
- start by placing the first window into a right corner or right side using the dropdown layout (or dragging and/or keyboard shortcuts)
- cancel the snap assistant with the esc key if it comes up.
- if your initial window was in a corner on right edge, then drag the next new window to the other right corner. Otherwise drag the next window to the left edge to fill re remaining area
- If you want more windows on left, drag the far left edge to resize the window narrower to allow you new windows.
- then go back and repeat step 3 and 4 until you are ready to place last window or windows on far left.
- if you want double stack than just drag them to the corner, and if just one, just drag to left to snap it.
See the animation below of this whole process:
I hope you enjoyed this article. If you feel it needs to cover more or have suggestions or corrections, please email me at gjenkinsedu@gmail.com or comment below.
end of article